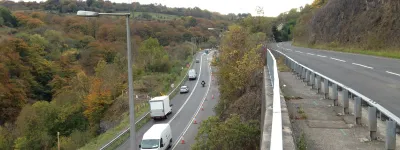
This tour will take you on a full circuit of Ring Road, from junction 1 around to junction 9 in order (in other words, the full journey clockwise). It does it in just 17 pictures, but if you want more there's another 35 covering the junctions over on the junction tour page.
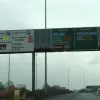
Having set off from junction 1, there's an immediate exit on the left — it's junction 2! This gantry signing is standard all the way around.
As we pass over the top of junction 2, there's the first sign of junction 3 — with its number on a huge red patch — mounted on the back of a gantry sign on the opposite carriageway.
Between 2 and 3, the road is elevated and four lanes wide. Luxury! But as this and the previous photos show, the 'weaving space' between junctions is virtually non-existant. The left hand two lanes are about to vanish again.
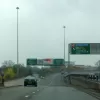
On the flyover through junction 3, it's pretty clear that high mast lighting is in fashion here in Coventry. Up ahead are the gantry signs for junction 4.
Between 3 and 4, there's even less room to maneouvre. The angle of this picture gives a false perspective, but it's still not very long. For this reason, all the signs get anything going beyond the next junction into the right hand lane, leaving the left one free for people fighting to get on or off.
Over the flyover at junction 4, with the rest of the junction below us. The speed limit here is 40, but this flyover curves so tightly that the car was almost sliding at that speed.
Between 4 and 5, we seem to have five lanes here, and for the only time on the whole road we turn left instead of right for a while. The layout here gives priority to traffic joining, with an acceleration lane from 4 continuing after the diverge for 5.
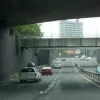
Underneath junction 5, with some seriously chunky flyovers. The underpasses are the most claustrophobic parts of the road, though all of it is packed into as small a space as possible.
The exit for junction 6. Straight ahead, the gantry over the left hand lane (always signed for the next exit) has some variable message panels. The top part is for parking information; the bottom two lines are accompanied by an 'information' symbol and on this occasion helpfully read "watch your speed".
A slightly motion blurred photo showing the approach to the junction 6 underpass. Notice the unusually tall streetlights — they're tall enough for traffic on the sliproad, but serve the mainline as well.
On the junctions with underpasses, there are lay-bys — presumably just because the space was available. I'd hate to have to stop here and then try to get back out, particularly going the other way where you'd be on the inside of a corner.
The exit for junction 7 — it's only a B-road but it's dualled out to the bypass whereas the A4114 isn't. It's certainly given special treatment — a deceleration lane begins before junction 6 merges in and the frantic weaving starts.
A steep sliproad climbs to the A4114 for Birmingham, while a small cluster of unreadable LEDs inform drivers to watch their speed and that there's spaces at Leigh Mills car park. Watch the lorry.
The lorry driver isn't following the signs. On the Ring Road, normal lane discipline doesn't apply; if you're not turning off you keep right to make room for the poor souls who are. He's keeping left, as you would anywhere else, and seems to be making life difficult for the black car trying to pull out.
Over junction 8 and as junction 9 merges in, we're on to the straight (there's only one). The roundabout sign is ahead, warning that in a moment three lanes come to a sudden halt.
With thanks to Moogal for information on this page.
